
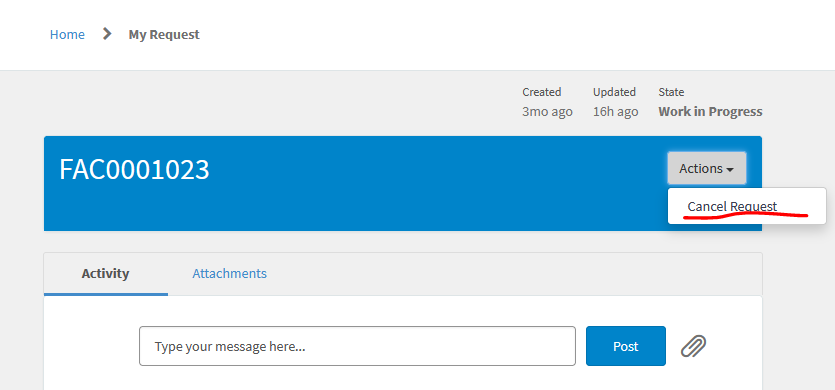
Employee Center in ServiceNow offers a plenty of Functionality for standard ticket types. Sometimes, if you implement an additional type of request, it is also necessary to add specific quick actions, which are available for the end user. For Instance, it makes sense to let user cancel own requests:
To achieve this, we can develop a Widget, analog to "Incident Standard Ticket Actions". The best way is to clone standard widget in Widget Editor.
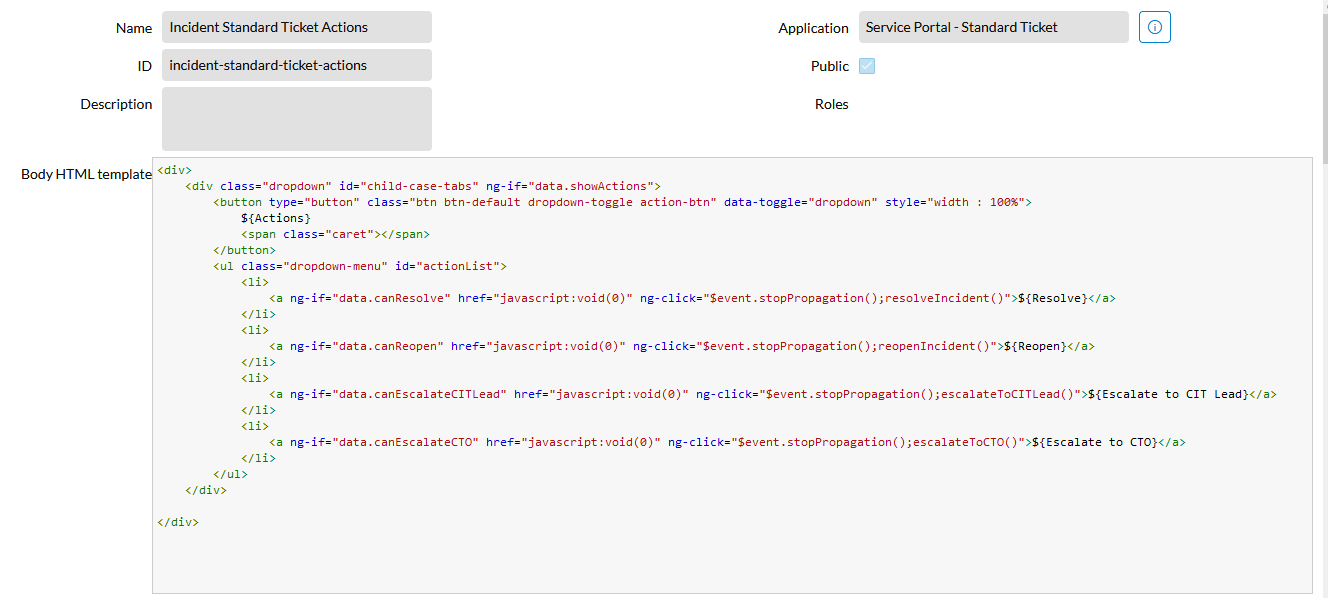
In Body HTML template we can remove or add Dropdown Options, according to our needs. For instance, if only Cancellation should be available, leave one <li>*-Tag with following markup:
    <li>
        <a href="javascript:void(0)" ng-if="c.data.showCancel" ng-click="c.cancelCase()">
            ${Cancel request}
        </a>
    </li>
In this Snippet "c" - is a current scope, "c.data" - intern data, which is passed to/from Server Controller, "showCancel" - our variable, which defines, whether the Action is available. "cancelCase" is a Function, which should be implemented as follows in Client Controller:
c.cancelCase = function() {
    $scope.data.action = "cancel_request";
    c.server.update();
};
In Server Controller we should handle the posted Action. To do this, add following code to Server Controller:
if(!gs.nil(input)){
    if(input.action == 'cancel_request')
        cancelRequest(caseGr);
}
function cancelRequest(caseGr){
    caseGr.state = 7; // closed
    caseGr.update();
    data.confirmation = gs.getMessage('Request cancelled.');
    gs.addInfoMessage(data.confirmation);
    data.showCancel = false;
}
Now the simple Action is ready, let's imagine we additionally want to prompt User for cancellation reasons. To do so, add the following Dialog definition to HTML Template:
<div class="modal" id="rejectModal" role="dialog">
<div class="modal-dialog">
<!-- Modal content-->
<div class="modal-content">
<div class="modal-header">
<button aria-label="${Close}" type="button" class="close" data-dismiss="modal">×</button>
<h4 class="modal-title" tabindex="0" style="color:#717171;">${Enter a reason for this rejection}</h4>
</div>
<div class="modal-body">
<label for="rejectReason"><span class="field-decorations ng-binding" style="color:#717171;"><span class="fa fa-asterisk mandatory" title="Required" style="padding-right: .25em" aria-label="Required "></span>${Reason}</span></label>
<textarea rows="3"
id="rejectReason"
class="form-control"
style="resize: vertical"
ng-model="c.data.rejectReason"
placeholder="${Enter reason}">
</textarea>
</div>
<div class="modal-footer">
<button class="btn btn-default" data-dismiss="modal">${Cancel}</button>
<button class="btn btn-primary" ng-disabled="!c.data.rejectReason" ng-click="c.onReject()">${Reject}</button>
</div>
</div>
</div>
</div>
To activate this Dialog, Action button must be defined as follows:
<a href="javascript:void(0)" data-toggle="modal" data-target="#rejectModal" type="button" ng-if="c.data.showCancel">
After opening the Dialog and entering the reason, which is saved in "c.data.rejectReason" - Variable , submit must be handled in Client Controller:
c.onReject = function() {
    $("#rejectModal").modal('hide');
    c.data.action = "cancel_request";
    c.server.update();
};
and Server Controller:
function cancelRequest(caseGr){
    caseGr.state = 7;
    caseGr.comments = rejectReason;
    caseGr.update();
    data.confirmation = gs.getMessage('Request cancelled.');
    gs.addInfoMessage(data.confirmation);
    data.showCancel = false;
}
That's it, now this newly cloned and updated Widget must be registered within of Standard Ticket Configuration. To do this, create a new ticket configuration for your custom table, go to "Action Region" and specify your Widget in Action Widget - Field. Mission is accomplished!


